
Barcode Sample Management Laboratory Software: Guide
Bottom line: Barcode sample management laboratory software should give each specimen a unique identity and connect that identity to collection, dispatch, receipt, accessioning, testing, exceptions and reporting. For collection-centre and hub-lab networks, the key buying test is whether staff can trace where a sample is, what happened to it and what should happen next.
Who this is for: Diagnostic laboratory owners, lab managers, collection-centre teams, pathology operations teams, laboratory IT administrators and procurement teams evaluating barcode-enabled LIMS software.
Quick answer: Use barcode sample management when your laboratory needs reliable specimen identification and visibility across multiple handoffs. It is especially useful for collection centres, hub laboratories, multi-site diagnostic networks and workflows where missing, rejected or delayed samples need investigation.
Barcode sample management works best when the barcode follows the specimen through the whole workflow—not when it is treated as a label-printing feature. For collection-centre networks and hub laboratories, the LIMS should connect one unique sample ID with collection, transport, receipt, accessioning, testing, exceptions and reporting.
Featured snippet: Barcode sample management laboratory software gives each specimen a unique identifier and links it to the correct patient order in the LIMS. Scanning can record collection, dispatch, hub receipt, accessioning and processing. This gives collection centres and central labs a clearer sample trail and helps staff investigate missing, rejected or delayed specimens.
Why does sample mislabelling become harder to control across multiple locations?
Short answer: Every additional collection, transport or processing handoff creates another point where the physical specimen and electronic record can become disconnected.
A sample collected at one location may be transported to another facility before testing. That creates more handoffs, more opportunities for manual entry and more questions when something does not match.
The operational chain is simple:
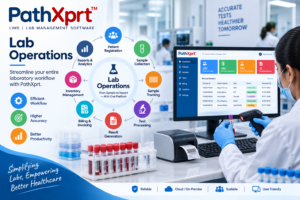
Collection centre → Barcode label → Sample collection → Dispatch → Hub receipt → Accessioning → Testing → Result verification → Report
The problem is not just identifying the tube. The laboratory needs to know whether the electronic record and physical specimen still refer to the same sample at every important handoff.
The supplied brief identifies mislabelled samples as a major operational risk and positions barcode + LIMS as the software approach to address it. That is useful editorial direction, but it should not be converted into an invented error-rate statistic. citeturn2file0L15-L23
What does barcode sample management actually do?
A barcode gives the specimen a machine-readable identity. The LIMS gives that identity context.
After scanning, authorised staff should be able to retrieve the relevant sample record and see the information required for the next step. Depending on the configured workflow, that can include the patient/order relationship, specimen type, collection location, current status and assigned tests.
That is different from simply printing a barcode sticker.
PathXprt already describes sample tracking as a laboratory workflow that follows samples from collection to final report with barcode support. citeturn0search1
How should a unique sample ID work?
The first rule is simple: do not let different collection centres invent their own identification logic.
The laboratory should define how sample IDs are generated and how they relate to patient records, orders, accessions and specimen containers. The exact ID design should follow the laboratory’s SOPs and software configuration.
During implementation, test at least these cases:
- A new sample collected at a centre
- Multiple specimens for one patient/order
- A recollection
- A sample that requires a repeat or additional test
- A damaged or unreadable label
The purpose is to make sure a staff member cannot accidentally create a second electronic sample record when the physical specimen already exists.
What should happen at the collection centre?
Short answer: Generate the barcode from the correct patient/order/specimen record, apply it according to the laboratory procedure and verify the label at the defined workflow points.
Start the barcode workflow at the point where the specimen enters the laboratory process.
The usual sequence is:
- Register the patient and required tests.
- Create or associate the specimen record.
- Generate the unique sample ID.
- Print the appropriate label.
- Attach and verify the label according to the laboratory procedure.
- Record collection location and relevant collection details.
- Prepare the sample for transport to the hub.
The important connection is between the physical tube and its electronic record.
Practical example: If a collection centre dispatches 100 specimens and the hub receives 99, the LIMS should help staff compare recorded collection and dispatch events with hub receipt rather than forcing them to reconcile the batch from a separate spreadsheet.
Why does the label printer matter?
A barcode strategy is only as reliable as the printing and application process around it.
Before buying software, test the actual label printer, label dimensions and specimen containers used by your laboratory. Ask the vendor to demonstrate:
- How the label is generated from the correct sample record
- How duplicate IDs are prevented
- How an authorised reprint is handled
- What happens when a label is damaged
- Whether different specimen types need different label layouts
- Whether the chosen scanner can reliably read the printed labels
Do not select a barcode format or printer simply because it appears in a generic product brochure. The choice should fit your actual workflow and documented procedures.
How does a sample move from a collection centre to the hub laboratory?
Short answer: The LIMS should record collection, dispatch and hub receipt so teams can compare expected and received specimens.
This is where barcode tracking becomes more valuable than barcode printing.
Suppose a network has several collection centres sending specimens to one central laboratory. The system should make the expected and received samples distinguishable.
A useful status model might show:
- Collected
- Ready for dispatch
- Dispatched
- Received at hub
- Accessioned
- Processing
- Rejected or held
- Testing completed
- Report ready
The exact statuses should come from the laboratory’s own workflow. The point is visibility: staff should not need a separate spreadsheet to determine whether a sample was collected, sent or received.
Laboratory Sample Tracking System
What is multi-site accessioning?
Multi-site accessioning means keeping the collection location and the processing location connected without confusing the two.
A specimen may be collected at Centre A, transported to Hub B and processed by Department C. The LIMS should preserve those relationships.
During a software demo, ask the vendor to answer these questions using one sample:
- Where was it collected?
- When was it dispatched?
- When did the hub receive it?
- Who or which workstation accessioned it?
- Which department received it for testing?
If the answers require separate systems or manual reconciliation, the sample workflow deserves closer review.
What should happen when a barcode is unreadable?
This is one of the most useful tests in a LIMS demonstration.
A barcode can become unreadable because of printing quality, label damage, storage conditions or handling. The correct response is not to create a new sample ID by guesswork.
The laboratory should have a controlled fallback process that allows authorised staff to identify the existing specimen safely. The software should make the original record recoverable rather than silently creating a duplicate.
Ask the vendor:
“The barcode cannot be scanned. Show me exactly what the technician does next.”
Then test the answer with your own sample workflow.
How should duplicate or incorrect sample IDs be handled?
Duplicate identifiers create a different problem from unreadable labels. A duplicate can make two physical specimens appear to be one record, or cause the wrong record to be selected.
The system should therefore have controls around ID creation and correction. If a correction is permitted, the laboratory should know who performed it, what was changed and what the approved recovery procedure is.
Do not assume that adding a barcode automatically removes identification risk. Human verification, SOPs, training and controlled correction processes still matter.
What happens when a sample is missing?
A good lost-sample workflow starts with the last known event.
Imagine a collection centre dispatches a batch of specimens and the hub receives one fewer sample than expected. The system should help staff investigate the discrepancy by checking the recorded collection, dispatch and receipt events.
The missing specimen can then be handled through the laboratory’s documented exception process rather than disappearing into a manual register.
The same principle applies to a sample that reaches the hub but cannot be accepted for testing.
How should rejected samples and recollection be handled?
A rejected specimen should remain visible as an exception. The laboratory should record the relevant rejection reason according to its own acceptance criteria and SOPs, then follow its recollection or corrective workflow where applicable.
The key is continuity. Recollection should not make staff lose the relationship with the original order or the history of what happened.
Ask the vendor to demonstrate a sample that is received, rejected and then recollected. Check whether the original and new specimen records remain understandable without creating ambiguity.
What does chain of custody mean in a barcode workflow?
Use the phrase carefully.
For a diagnostic laboratory network, the practical objective is to preserve the relevant handoff history: collection, dispatch, receipt, transfer and processing events where those records are required by the laboratory’s procedures.
Do not claim that one particular barcode feature automatically satisfies every chain-of-custody or accreditation requirement. The applicable quality requirements must be checked against the laboratory’s scope, SOPs and current regulatory/accreditation documents.
NABL’s current document resources include guidance and criteria for medical laboratories and sample collection centres. Verify the specific requirement applicable to your laboratory rather than treating “barcode enabled” as an accreditation claim. citeturn0search0
How do barcode scanners fit into the LIMS?
The scanner should support an action, not merely prove that the barcode is readable.
For example:
Scan → retrieve sample → confirm identity → update status or location → continue workflow.
Some laboratories will need scanning at collection, receipt, accessioning, department transfer, testing or storage. Others will use fewer points. Define the scanning points from the actual workflow rather than copying another laboratory’s setup.
What should you verify before choosing barcode-enabled LIMS software?
Do a live workflow test. Do not compare vendors only from feature lists.
- Collection: create an order and print the correct sample label.
- Identification: scan it and verify the correct patient/order/specimen relationship.
- Dispatch: record the sample leaving the collection centre.
- Hub receipt: identify expected, received and missing specimens.
- Accessioning: move the sample into the correct department.
- Exception: make the barcode unreadable or mark the sample rejected.
- Recovery: show the controlled process for correcting or recollecting the specimen.
- History: review the sample’s recorded events.
This test tells you much more than asking, “Does your LIMS have barcode management?”
Multi-Location LIMS for Diagnostic Chains
What are the common barcode implementation mistakes?
- Buying a printer before defining the sample workflow
- Creating different ID conventions at different collection centres
- Using manual spreadsheets alongside the LIMS without a clear source of truth
- Creating a new sample record whenever a barcode cannot be scanned
- Ignoring transport and hub receipt events
- Testing only the successful workflow during software selection
- Assuming barcode technology alone provides compliance
- Failing to define who can correct sample-identification errors
The biggest mistake is simple: implementing barcode printing without designing what each scan is supposed to prove or update.
How should a collection-centre and hub-lab network implement barcode management?
Start small.
Map one complete specimen journey from registration through final reporting. Mark every physical handoff and every place where the electronic record needs to change.
Then configure one collection centre and one hub workflow. Test normal samples first. After that, deliberately test the failures: unreadable barcode, missing sample, duplicate ID, rejected specimen and recollection.
Only after the workflow is stable should it be rolled out across additional collection centres.
Measure the implementation by whether staff can answer one practical question:
“Where is this sample, what happened to it, and what should happen next?”
Why is this relevant for growing diagnostic networks?
The supplied research brief marks this topic as a growing long-tail search opportunity and notes that search volume was not available on 2026-09-17. citeturn2file0L15-L27
Separately, BW Healthcare World reported more than 40% diagnostics growth for Tata 1mg in FY26. That source should be checked directly before using the figure in any commercial presentation or market-size claim. citeturn0search0
The practical point is not that growth automatically proves a need for one particular technology. As diagnostic operations spread across collection points and central laboratories, sample movement becomes harder to manage manually. Barcode-linked LIMS workflows are designed to make that movement more visible.
Barcode Sample Management: FAQs
What is barcode sample management laboratory software?
It is LIMS or laboratory software that connects unique barcode-based specimen identification with sample collection, accessioning, movement, processing and reporting workflows.
Can barcode software track samples from collection centres to a hub laboratory?
Yes, if the LIMS is configured for multi-site workflows and records the relevant collection, dispatch, receipt and accession events.
What should happen if a laboratory barcode is unreadable?
The laboratory should use a controlled recovery process to identify the existing specimen rather than creating a duplicate record by guesswork.
Can barcode software find a lost sample?
It cannot physically locate a specimen that was never recorded, but it can help investigators identify the last recorded event and narrow down where the workflow stopped.
Does NABL require barcode sample management software?
Do not make that claim without checking the current NABL requirement applicable to the laboratory. Barcode technology can support identification and traceability, but it is not by itself proof of NABL compliance.
What is the best way to evaluate a barcode-enabled LIMS?
Use one real sample journey and test collection, label printing, dispatch, hub receipt, accessioning, exceptions, recovery and history. Include at least one failed scenario.
Practical recommendation: Before selecting a barcode-enabled LIMS, take one specimen from a real collection centre through transport and hub accessioning, then deliberately introduce an unreadable barcode and a missing-sample scenario. The software that handles the exceptions clearly—not just the normal scan—is the one worth taking seriously.